- The Box Card
- Magic Card
- Criss Cross Cards
- Cutting Shaped card blanks
- Machine stitching on cards
- Making Boxes for cards
- Christmas Easel Card
The Christmas Easel Card
Thank you for buying the Christmas Easel Card Kit from me, I must point out I can't take credit for the Easel Card shape, I don't know who first came up with it but it's a great shape for cards.

1) If you make your own card blanks like I do this is what you need to do...Cut out a piece of card 11 1/2" x 5 3/4"
Laying the card out flat, lengthways on the scoreboard, Score down the center at 5 3/4"
score again at 9" and 9 1/2"

2) Cut out the end section as shown above


3) Add double sided tape to this 1/2" edge and pull off the backing.

4) Cut out a piece of card 5 3/4" square

5) You should now have the above pieces of card. Lay the square 5 3/4" piece of card directly down onto the other card, it's usually best to place it down on the left hand side edge to make sure it's straight and let the card down slowly to cover the rest of the card

6) Your card should look like this on it's side

7) and this sitting properly....

8) Before gluing the Designer papers down...
Place ribbon & lace neatly over the top piece, fastening them (Ribbon & Lace) down with some tape at the back of the paper...
9) Glue the plainer piece of Designer paper down onto the bottom part of the card.
10) Attach Ribbon and Lace to the 2" strip of Designer paper, fastening down again at the back with tape. Then using Double sided Foam tape fasten that down onto the card base (as seen in the picture above.

11) Glue down your foliage, and the pearls string in a figure 8 shape.

12) Glue your flowers in the center of the foliage

13) Tie the bells to the string with a bow and place it under the flowers

14) Glue all the berries and place them between the flowers along with the Winter Cones. Cut out the sentiment and add glitter to it, place it so that you see it alongside the flower arrangement.

15) You have a choice of die-cuts or extra ribbon to make a bow to place along the bottom as in the two photos above.
Your Card is complete.
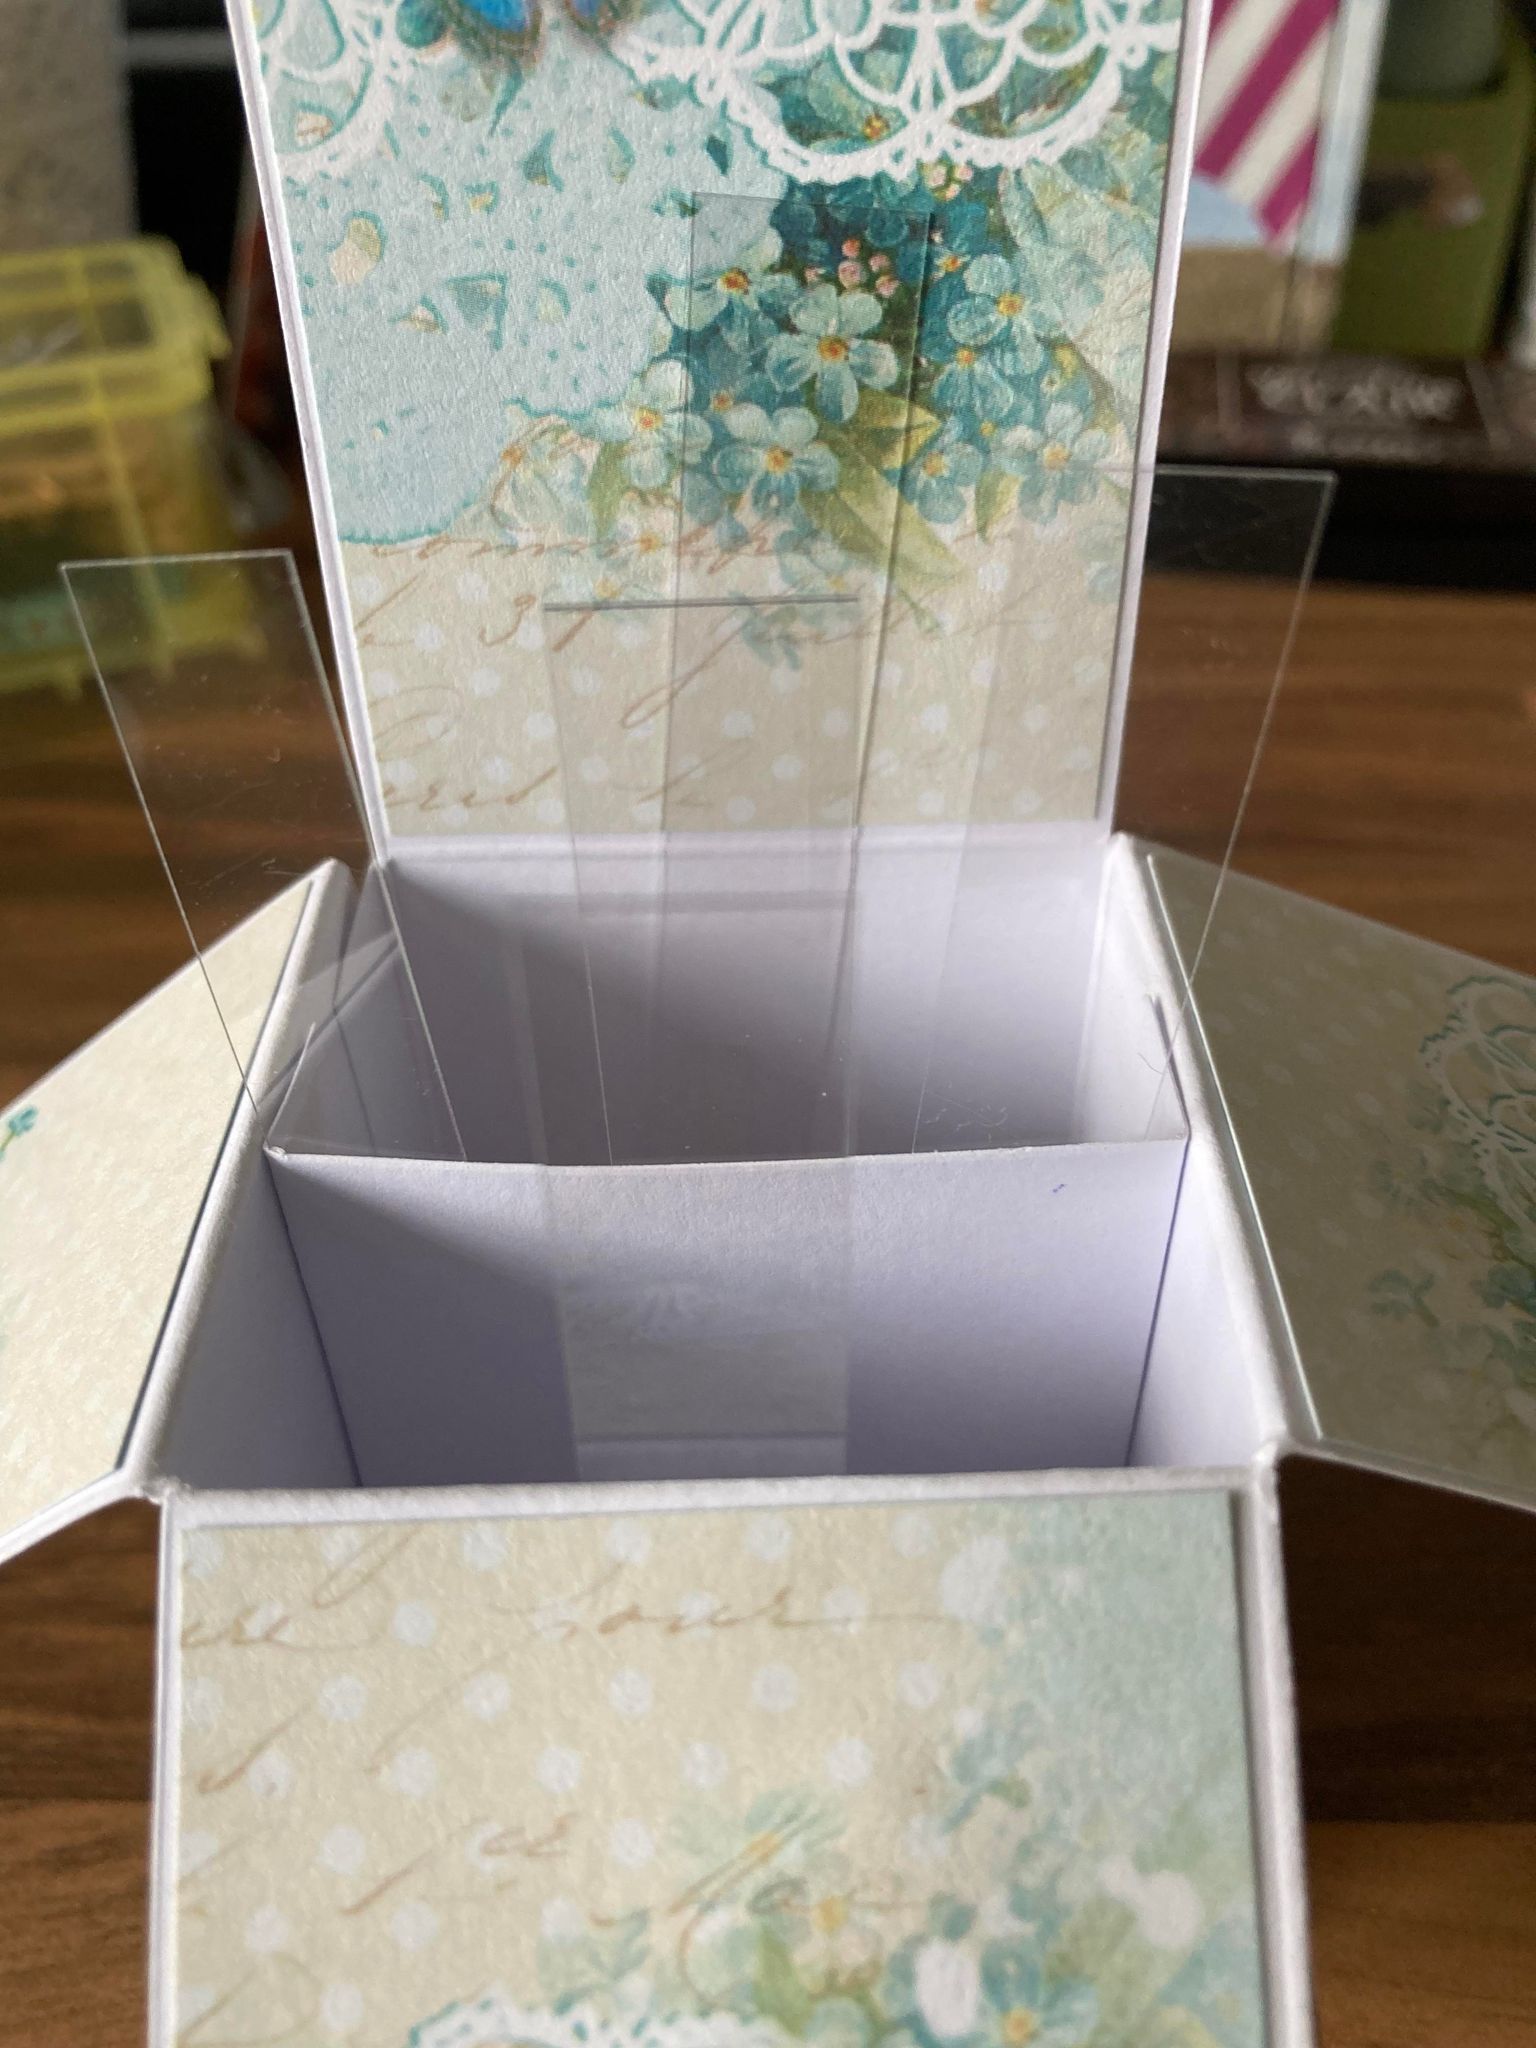
The Pop Up Card
1x Card 8 1/2" x 5 1/2" (A)
1x Card 1 3/4" x 5 1/4" (B)
1x Card 3" x 2 3/4" (C)
1) Layout card A in front of you

2) Glue Card strip (B) near the tab (this is the back of your card)


Thank you. x
THE MAGIC CARD
If you bought the latest Kit of a Magic Card from me, you have come to the right place..... Here is how you make the Card.
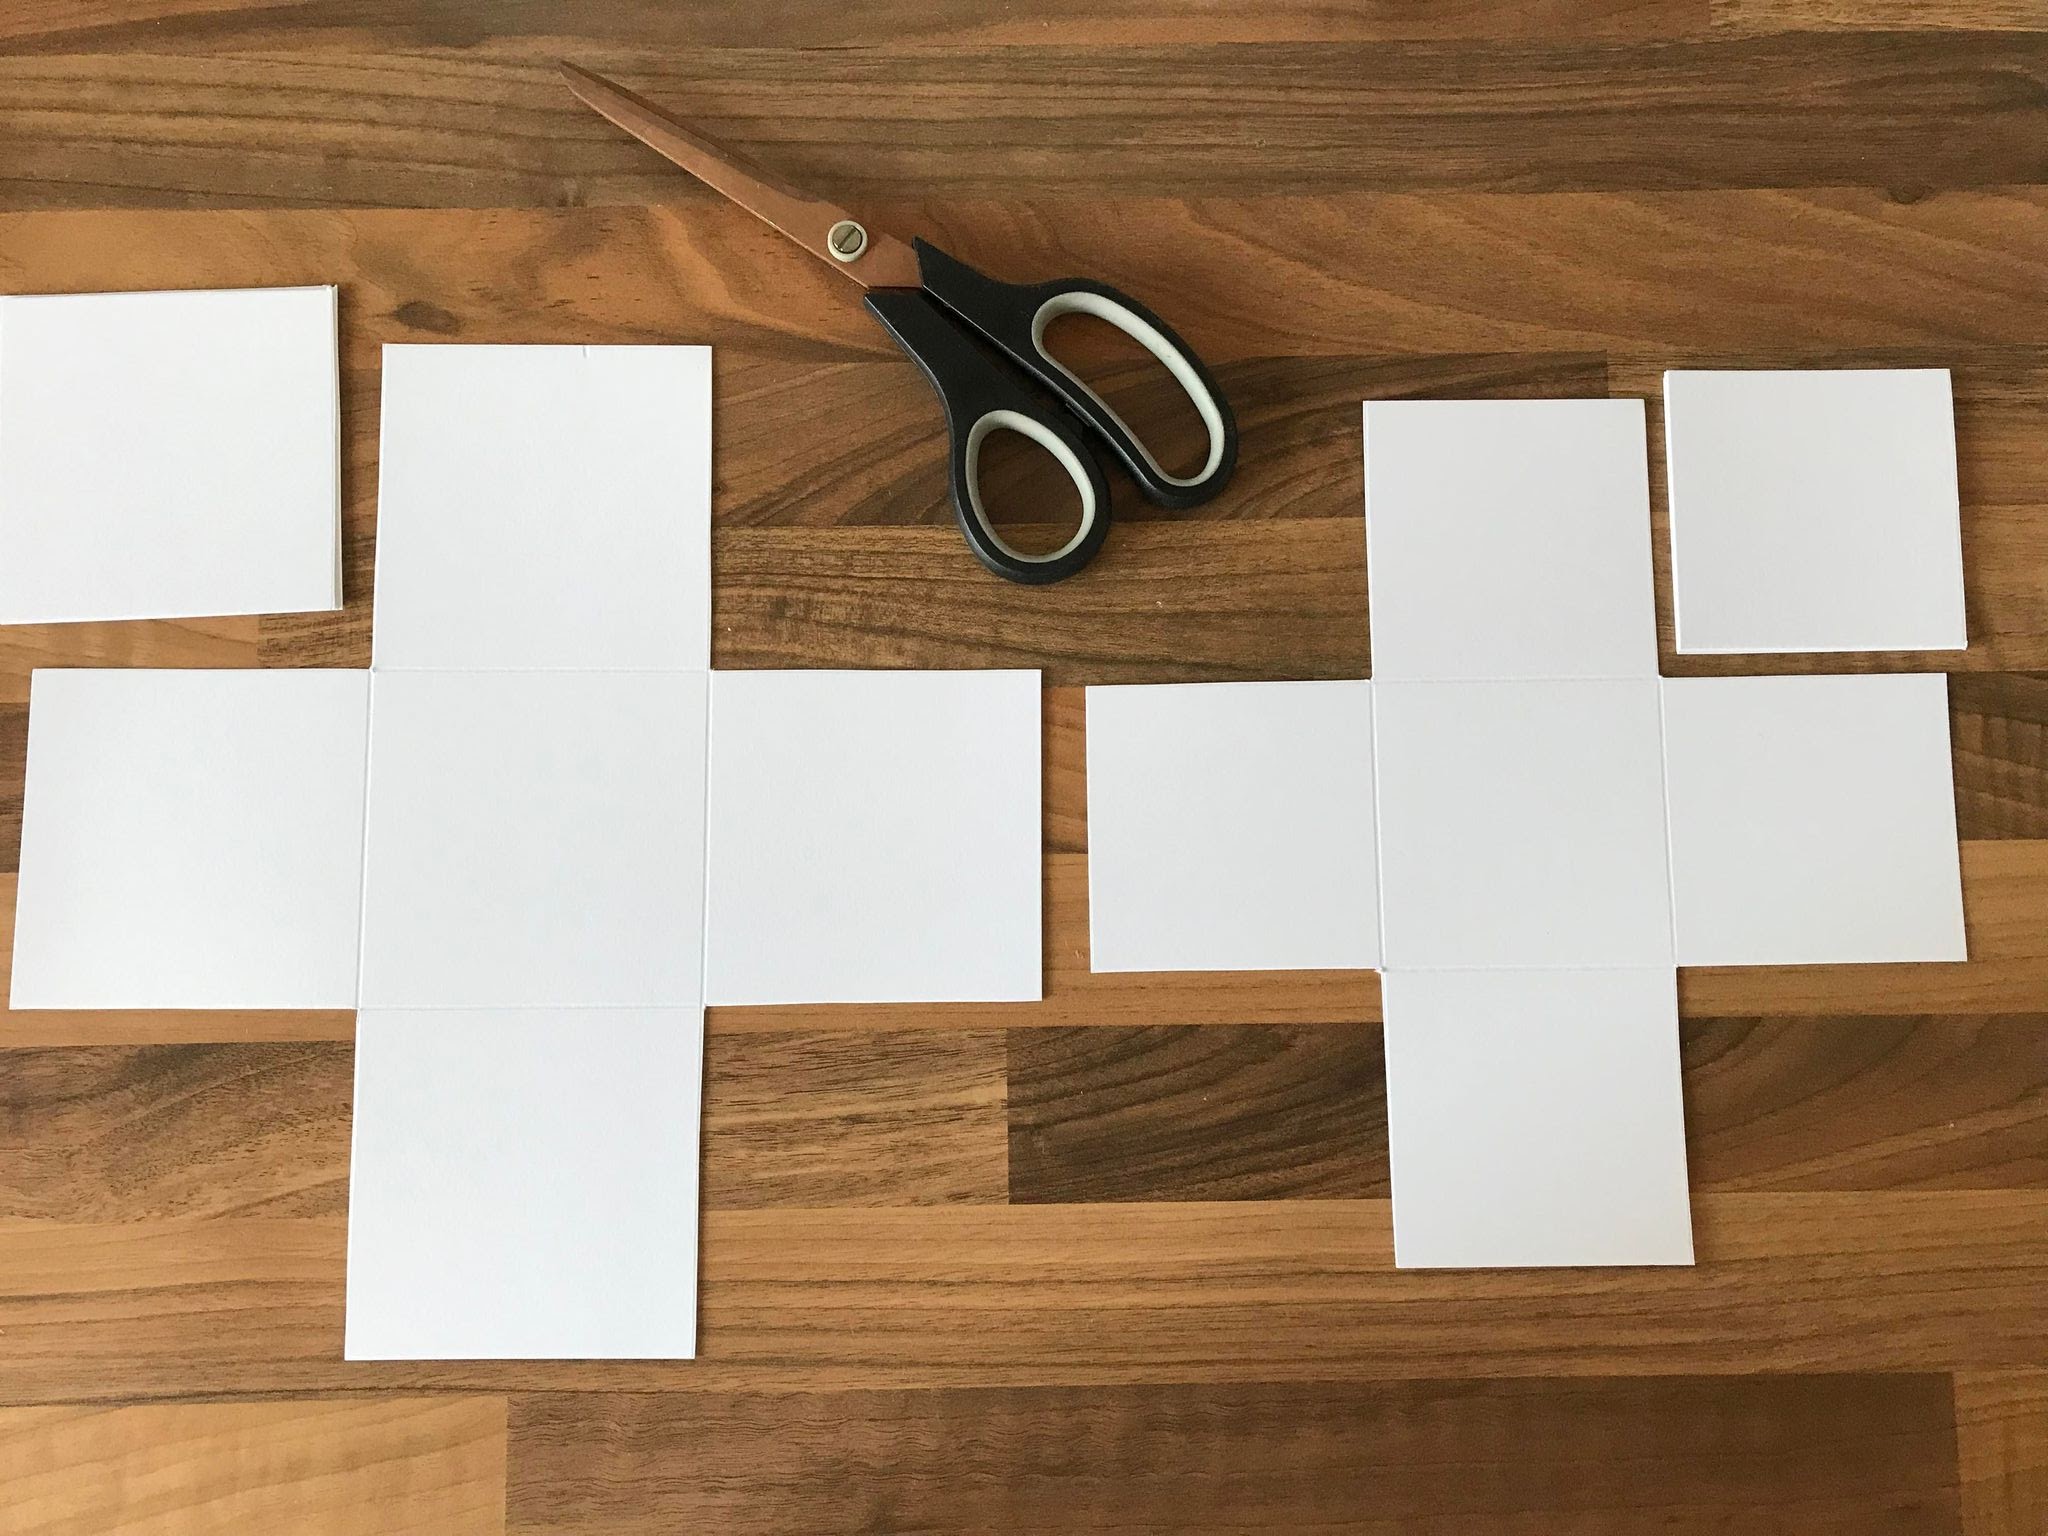
1) Start with 3 pieces of card;
1 x 7" x 6" Score at 1 1/2" and 5 1/2"
1 x 6" x 6" Score at 1" and 5"
1 x 4" x 8" Score at 6" and 6 1/8"

2) You can decorate the edges with a punch or die as you wish but remember to cut the papers to match.


4) attach the 4" piece of card as below to the center of the 7" x 6" piece

5) Lift the middle section upwards and add the 6x6" piece of card at the center,

6) Bring down the top piece and your card blank it complete.

7) You have in your pack the papers needed for the card.
8) Add the 1 1/2" strips down the side edges, followed by the 1" strips at the front edges. Add strips of lace as shown in the pictures.
Glue down the papers inside and out and the pretty doily to the side of the front.

9) Basically add your pearls in a figure 8 it doesn't have to look perfect as some of these will be covered with flowers.
10) Arrange the foliage and flowers as in the photo below.

11) Glue the little oval in place inside for your own greeting.

12) Cut out your butterflies and fix them onto the card using a small amount of glue.
13) Fold the stamens over and glue the cotton, twisting it between your finger and thumb to get them to stick together. Glue them below the flowers by pushing them gently into place. Add a sentiment and your card is complete.
Many thanks to all who bought kits from me xxx
P.S. I don't take credit for this shape card, I found it myself in blogland.
The Box Card
People on Facebook have asked if I would show them how the Box Card is made, so here goes...

Cut out a Square piece of Card 10 1/2" x 10 1/2"
Score at 3 1/2" and 7" turn once and do the same again

Cut out a second piece of card in a square 9" x 9"
Score at 3" and 6" turn once and do the same again.
Cut out the corner squares on both pieces
***PLEASE NOTE***
It is important at this stage to choose your papers, you need to decide which of the designer papers you want on the outside of the larger box and on the middle (inside) of the smaller box.
The coordinating papers don't get seen so much as they are covered by photos.

Cut out 8 square pieces of designer papers 3 1/2" x 3 1/2" and glue to the squares for the outside of the box and again for the inside of the box as below

Add a square of paper to the center

Do the same for the smaller squares both sides
and as before adding a center square of paper (3" papers)

Place the smaller piece on top of the larger and glue down carefully into the center as below

For the Lid....

Cut a square of card 5 5/8" and score at 1" all around.
Snip into the corners as below

and fold all the scored lines as below

Cut out the following papers
1 piece at 3 1/2" x 3 1/2"
4 pieces at 3 1/2" x 1"

Cover the box lid

Your box is complete and ready to embellish as you wish


I added this little chocolate box,
see below on how to make it for the center.
Cut a piece of card 4 1/2" square and score at 1 1/2" all around
Cut out the four corners as you did to make the main box above.
Cut a piece of card 2 5/8" square and score at 1/2" all around for the lid.
Fix the lid together and decorate with papers and embellishments of your choice, place over little box.

~~~~~~~~~~
Thank you for looking, please leave a comment if you found it easy to follow or if you have any questions.
.jpg)
Did I mention I'm selling card kits now?
If anyone is interested in knowing more about them please leave me a message here or on facebook and I'll get back to you with more information. Thank you to everyone who has bought kits so far. xx
~~~~~~~~~~~~~~~~~~~~~~
The Magic Card
I'm adding the Magic Card to my tutorials, purely because if I forget 'how to' I can refer back here
Before I start I'd just like to say I cannot take credit for this lovely card shape, I found it on the StampArtic blog and have loved making them ever since, I always worry that blogs might be deleted and I lose my favourite tutorials


 3) Add tape to the back of the smaller one of the two pieces and the short edge of the 4" strip
as below
 4) With the largest piece of card (7x6) laying flat, place the 4" strip as shown below
 5)Next remove the tape and stick down the smaller piece (6x6) in the center
(below)
the 4" piece of card sticking out the top is the front of the card as seen in the next photo
 6) Now you have your card blank made it's time to add papers

 8) Place the 1" strips down the outer edges
 9) Place the 1/2" strips down the inner edges
 10) Place two of the larger pieces one at the top (flap)
and one below which is the inside of your card
 11) bring the flap down and place the last piece of paper on the front
That's the card made now it's time to decorate it...
 and here is my finished card.

Criss Cross Cards
Many people have asked me how I make Criss Cross cards and I used to send them a link to a tutorial on the Magnolia blog but as it's no longer there I thought I'd do a tutorial myself, I hope I explain it good enough for you.
~~~~~~
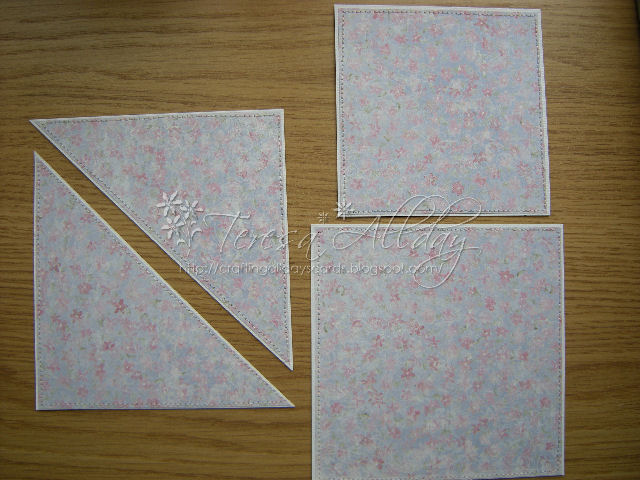
First of all you need 2 x 6" square cards
1) Using your trimmer you need to cut the front of each card diagonally as in a mirror image like below


3) Stick down on to the inside of the second card
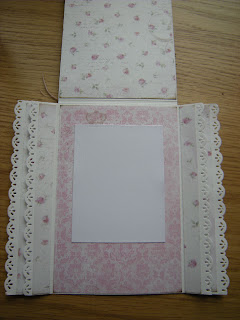
 4) Cut out card and your design of paper to decorate the inside and outside of the card as below
I've cut 2 squares 5 5/8" card
and 2 squares 5 1/2" paper
cutting one set diagonally to decorate the front of the card
the smaller square 4 3/4" card and 4 1/2" paper
is to go inside the pocket afterwards
 5) I like to add a small piece of double sided tape to secure paper to card whilst I'm sewing the edges, but if you want to add tape/glue to stick yours down that's fine
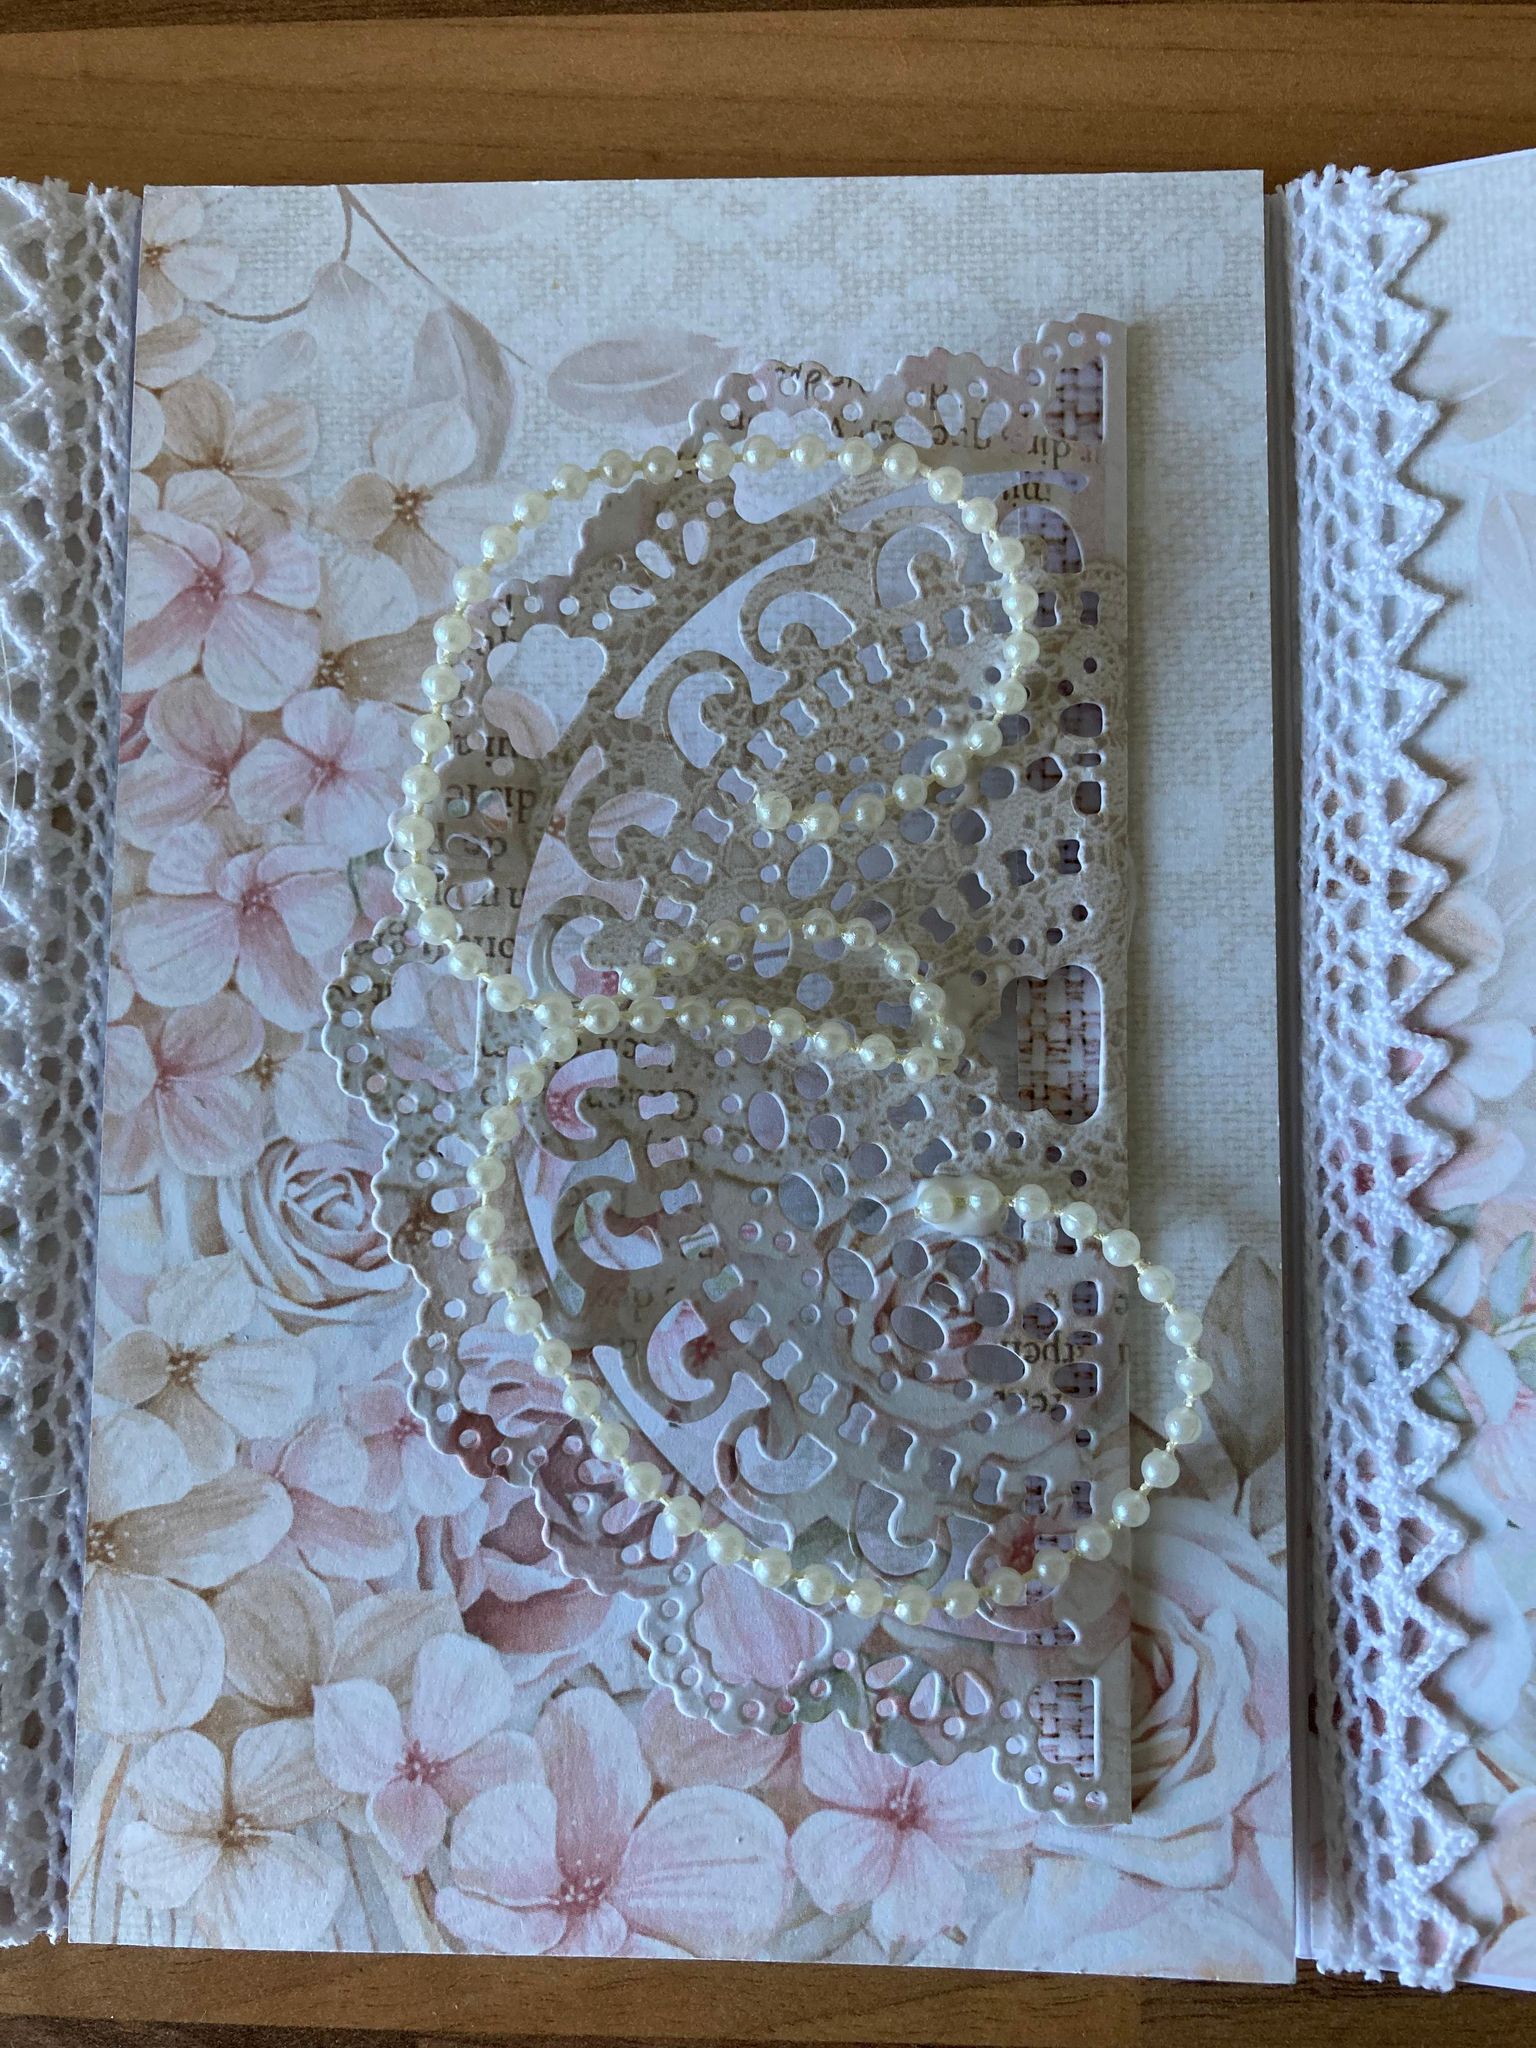
 6) Here are the papers sewn (or taped/glued)) to the pieces of card
 7) Starting with the large square, glue or tape it to the inside back of the card blank

8) Add a piece of tape across the bottom and remove the backing from the tape
 fold down the first side (either left or right it's up to you)
 9) At this stage I like to add my ribbon/lace, just so it sits neatly round the back before attaching these pieces to the card
 10) Decorate the small piece of card as you wish and pop it in the pocket
the card is now ready to fully decorate with image, flowers or whatever to like
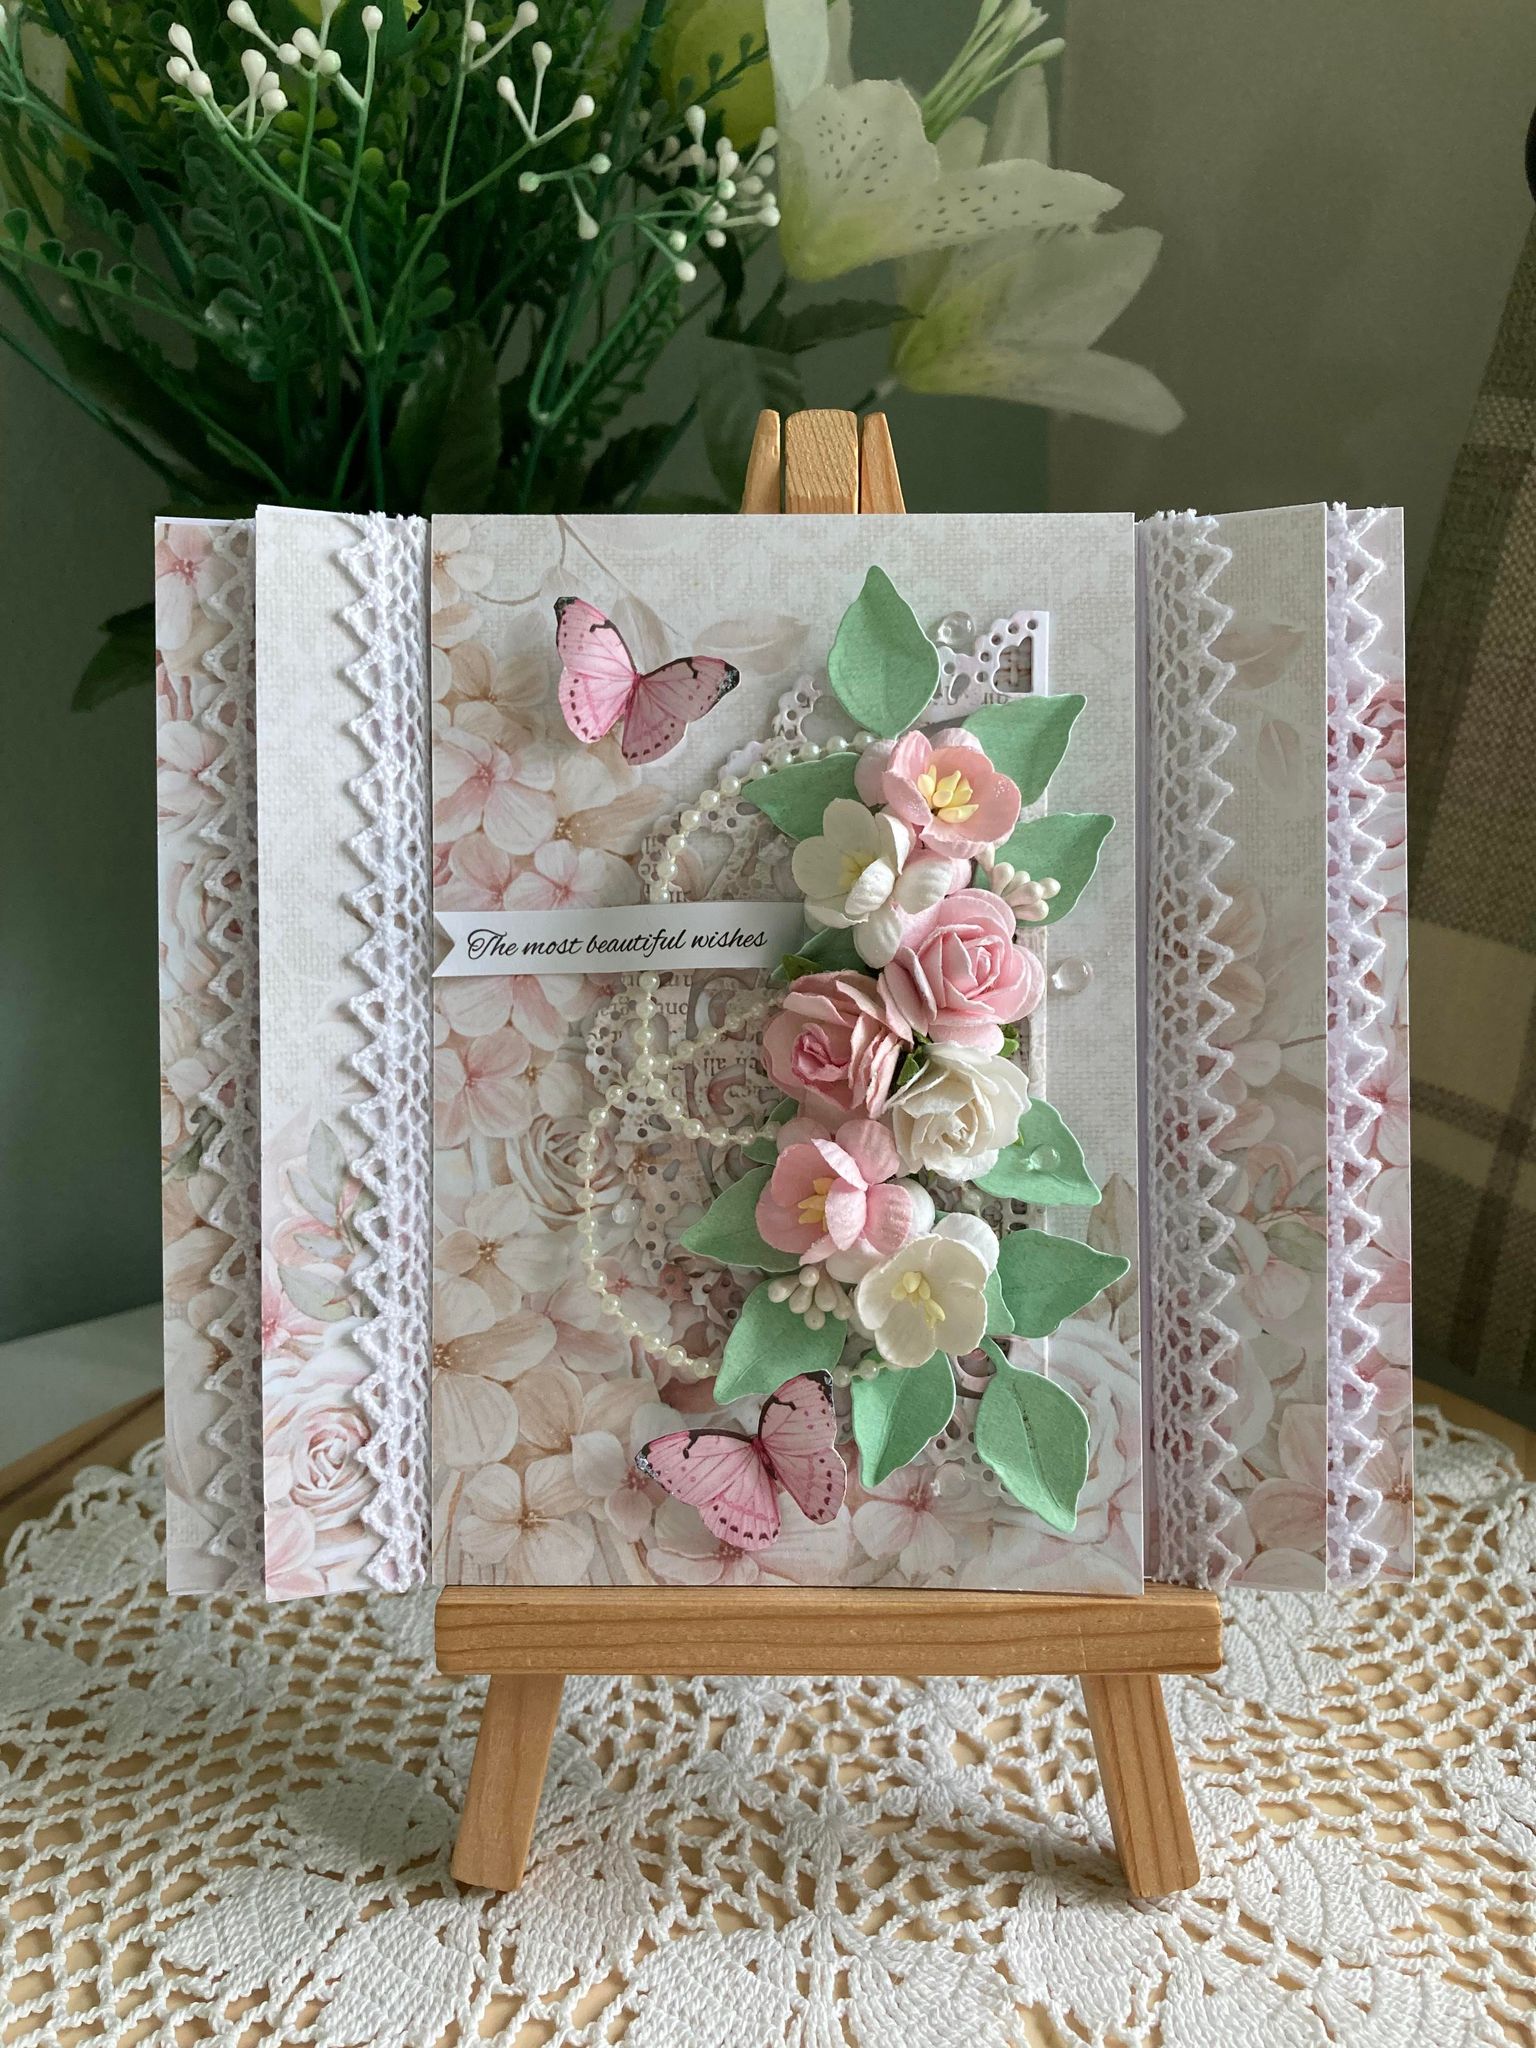
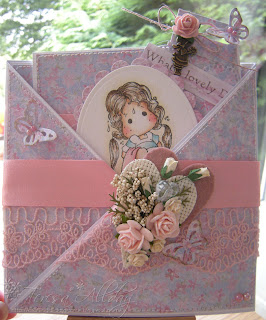
 The two photos below show my finished card

I am more than willing to help you.
Have fun!
hugs Teresa xx
~~~~~~~~~~~~~~~~~~~~~~~~~~~~~~~~~~~~~~~~~~~~~~~~~~~~~~~~
Shaped card blanks
I'm adding the Magic Card to my tutorials, purely because if I forget 'how to' I can refer back here
Before I start I'd just like to say I cannot take credit for this lovely card shape, I found it on the StampArtic blog and have loved making them ever since, I always worry that blogs might be deleted and I lose my favourite tutorials

1) The card is 6" top to bottom and 7" across
Cut 3 pieces of card
1st piece 7" x 6" ~ score at 1-1/2" and 5 1/2"
2nd piece 6" x 6" ~ score at 1" and 5"
3rd piece 4" x 8" ~ score at 6" and 6 1/8"
as below
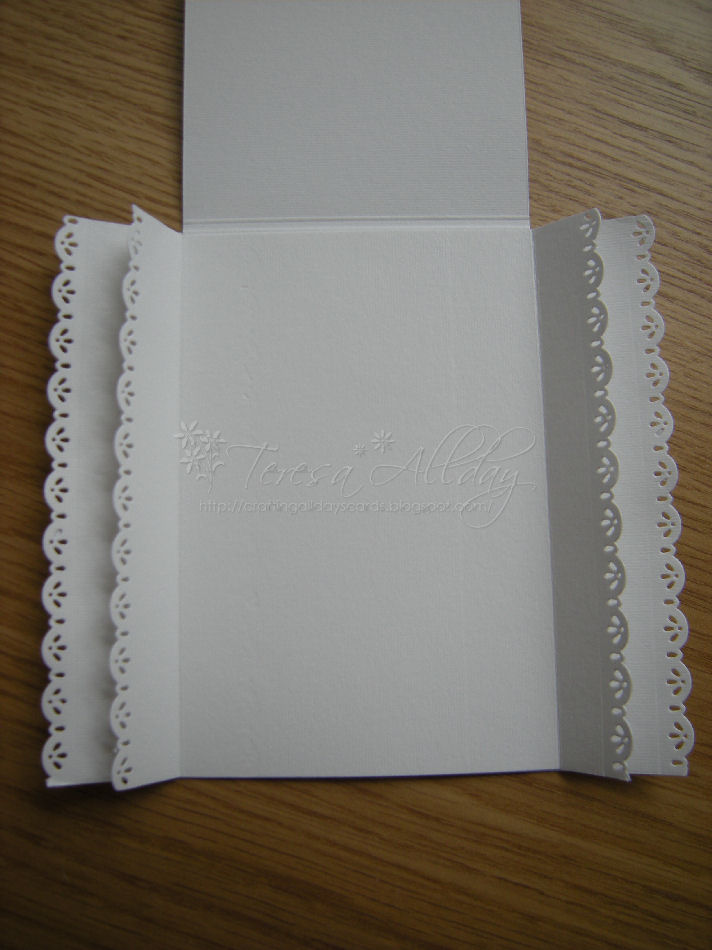
2) Choose a die or punch and cut the sides
I used the Magnolia Old Swedish Lace Die

as below


(below)
the 4" piece of card sticking out the top is the front of the card as seen in the next photo
7) Cut papers ~
3 pieces 5 7/8" x 3 7/8
2 pieces 5 7/8" x 1"
2 pieces 5 7/8" x 1/2"
I cut one in a different design but you don't have to.


and one below which is the inside of your card

That's the card made now it's time to decorate it...


and below is the inside, I added a piece of card for the greeting/message

I hope you try it they are fun to make,
Thanks for looking
hugs Teresa xx
~~~~~~~~~~~~~~~~~~~~~~~~~~~Criss Cross Cards
Many people have asked me how I make Criss Cross cards and I used to send them a link to a tutorial on the Magnolia blog but as it's no longer there I thought I'd do a tutorial myself, I hope I explain it good enough for you.
~~~~~~
First of all you need 2 x 6" square cards
1) Using your trimmer you need to cut the front of each card diagonally as in a mirror image like below

2) add double sided tape or glue along the edges of the back of one of the cards


I've cut 2 squares 5 5/8" card
and 2 squares 5 1/2" paper
cutting one set diagonally to decorate the front of the card
the smaller square 4 3/4" card and 4 1/2" paper
is to go inside the pocket afterwards


the card is now ready to fully decorate with image, flowers or whatever to like


And that's it!
I hope I've explained it easy enough, if you have any questions please ask,I am more than willing to help you.
Have fun!
hugs Teresa xx
~~~~~~~~~~~~~~~~~~~~~~~~~~~~~~~~~~~~~~~~~~~~~~~~~~~~~~~~
Shaped card blanks
I have been asked by a few people how to cut the pretty shaped cards...
First of all you need a large cutting machine and some Go-kreate dies

I use a A3 sheet of 300gsm white card to cut my card blanks

I score it at 8 & 2/8" as below then fold it in half...

next I choose my dies, these are Go Kreate XXL Square frames frilly #10
and I'm using the 3rd size die in from the outer to make 6" cards
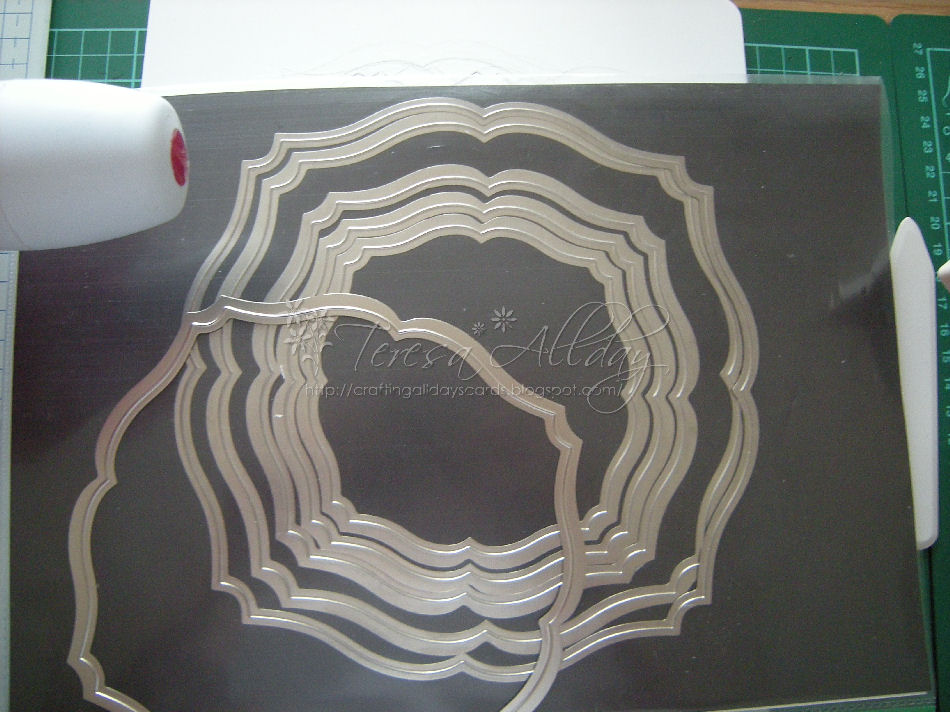
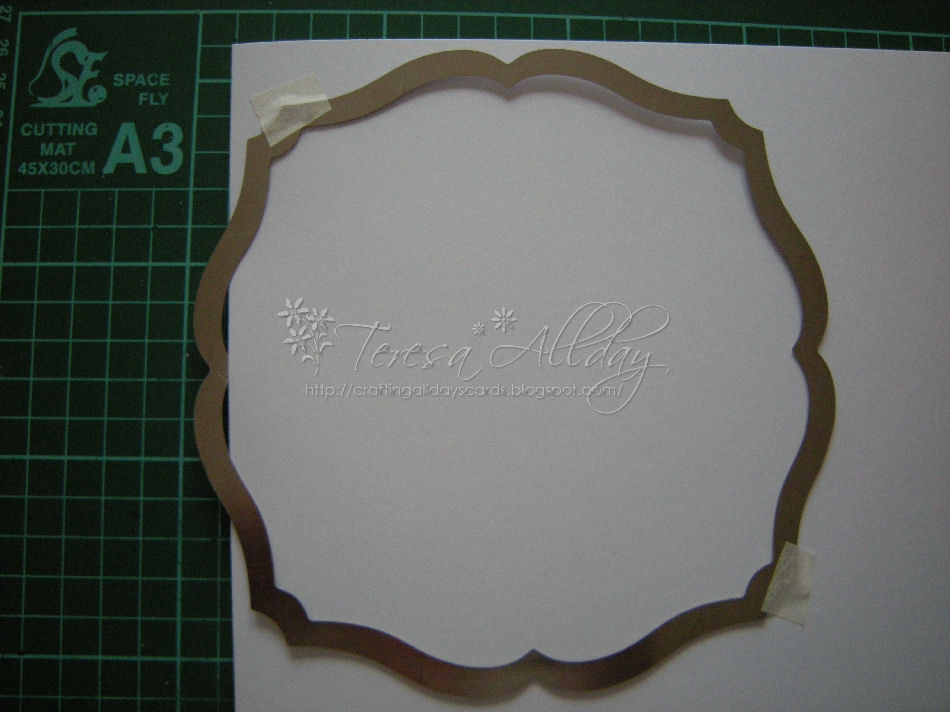
I position the die so it just over laps the side of the card and using a couple of pieces of masking tape to hold it in place
The sandwich is 'A' base plate, die facing upwards, card then 'C' cutting plate

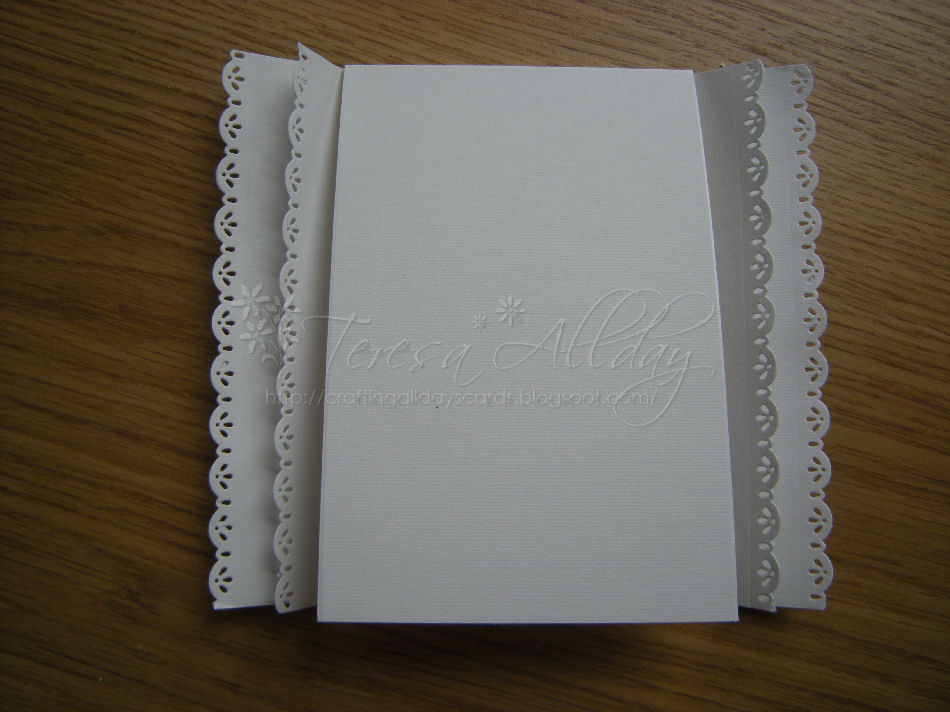
My card blank looks like this ...

Next up I cut a piece of base card and paper using the full die this time

I glue the paper to this base card, make up my complete topper

then glue the whole thing to the card blank.

Decorate however you wish...

I hope this is helpful to you :o)
Any questions please ask.
Hugs Teresa xx
~~~~~~~~~~~~~~~~~~~~~~~~~~~~~~~~~~~~~~~~~~~~~~~~~~~~~~~~~~~~~~~
Machine stitching on cards
First I coloured my image the lovely Giordano Baby Bunny GI0725 Stamp
I chose my papers which are from the Jane Shasky CD, my card and a doily.

I've used a small piece of double sided tape to secure the paper & doily to the card so it doesn't move about whilst sewing.

I've used my standard sewing machine, no special needle required and I
didn't have to adjust the tension.
I chose straight stitch but if you are practicing it's good to start with the zigzag as this doesn't show so much if you do go off the line a little. 
You can keep the sewing line straight by using the foot of the machine close to the edge of the card as a guide


If you are trying this for the first time and if you do make a mistake (wobbly lines etc) you could always pop a flower over that area to disguise it.
Here is the finished card.
Here is the finished card.
.jpg)
13 comments:
Hey sweetie pie, you are a star I found this so helpful and the pics are so clear, now why couldn't I just work this out, oh wait cos I am super thick!!! Thank you Thank you and Thank you <3 huggles Pops x x x
Hi Teresa.
Thank you for the shaped card tutorial.
You are a gem!
I tried it out today using my Go-Kreate large frilly frames #2 and was quite pleased as I use a Bigshot machine which will only take up to 6" square.
It was a bit hard to get a straight edge though when masking up as the frame has a point on each of the sides which meant If you overlap the frame to much you lose quite a bit of the card.
Do you decorate the inside?
Any tips please!
Thank you lots.
Crafty hugs
Donna x
This is truly appreciated & SOOOO helpful. I don't have any of the Go Kreate shaped dies yet but am trying to decide if I NEED the full set of 6 dies or if the set of 3 will be large enough ... I want 2 or 3 different sets. I LOVE the look of yours &really do love the tutorial you showed for doing this.
Hugs, Janie
Thank you for your fantastic tutorials! I cant wait to try all of these! Hugs Julie xox
Super tutorials teresa x
Your tutorials are great Teresa!!! Thank you for sharing with us. I will try ... .o))
Hugs,
Jasmina
Great tuts Teresa, I do love your cards, xxxx
Fab Tutorials thank you, I'm going to have a go! xxx
Thank you so much for the tutorial on how to make a criss cross cards....can't wait to make one now....also loved the info on stitching very useful. xxxxxx
~Amanda
What a beautiful cards, thank you for sharing this to us
regards from slovenia
Teresa, Thank you so much for allowing me to see how you make your beautiful cards. You are a doll.
Thanks again,
Chris in Las Vegas
great tutorials hun, thank you sooo much, very helpful. If I can turn out cards anywhere near as beautiful as yours I'll be happy xx xx xx
Thank you for the tutorials, I hope one day to be as good as you :)
Anne (in UK)
Post a Comment